FFV - Walkthrough - Chosen By The Four Essences
| Enemies | Treasure | Blue Magic |
| Money Mage, BlakGoblin, WhiteSnake (I), Mauldwin | Tonic(5), Tent, Leather Cap, Broadsword, Staff |
 Once you are finished messing around in Tule, gather your stuff and sail east to the Wind Shrine: it's the blue building surrounded by forest. The Wind Shrine is fairly easy - you can still kill most enemies with a single swipe of the sword, but it does present your first challenge: a boss enemy. If you get really lucky in here a Mauldwin will drop an Elixir for you, but don't set out to get one or you'll be disappointed as it is very rare.
Base Level
Treasure: Tonic (5)
Once inside, head up and then left to find the King's attendants yammering on about events as they are. The two at the bottom are of particular interest: one will heal your party and the other will give you five free fabulous Tonics. From there head to the right to the vine covered doorway and up to the next floor.
2nd Floor
Treasure: Tent, Leather Cap
First head left to get the Tent, then head down through central door to the first save point in the game. These will allow you to save your game and heal via Tents or Cottages. Don't waste a Tent in this easy dungeon, just save and press on. Back in the main room head right and up the stairs to get the Leather Cap (equip it!), then continue to the left and use the stairs.
3rd Floor
Treasure: Broadsword
Go around the perimeter of the room to the centre. (You can also go right to the centre of the room via a secret passage - it doesn't matter much). Ignore that first door becuase it doesn't go anywhere. Now that you've confirmed what I said by going into the door anyway, head left past the griffon/thing. Don't inspect him until you get the Broadsword from the door to the left and have equipped it (let Faris keep the Dirk as it does good damage). Once everything is in order, go ahead and check out the bird creature. It will lunge at you and initiate the first of many Boss battles.
| BOSS 1: Wingrapter | Level | 6-7 |
| A signature first battle to those of you who have had the pleasure of playing FF IV. Square just wants to test you to see if you're not just hacking blindly away at your opponents. Just like the Mist Dragon, Wingraptor will bunch himself up and wait for an attack. If you attack him in this position he will perform his powerful Iron Nail attack (you don't want to be on the receiving end of this, especially with your low levels). All you have to worry about is attacking him only when his wings are out. You might have to heal, but I doubt it. Slice and dice and victory will be yours! You get a another Phoenix Down for you efforts. | ||
4th Floor
Treasure: Staff
Your only mission here is to find the Staff. It is hidden in the lower right corner, in a secret passage. Once you get it, head through the door in the centre.
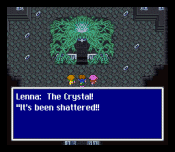
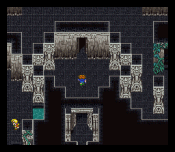
Crystal Room
Head up and you will suddenly receive the power of the crystals! Courage (red) in fire for Faris. Kindness (blue) in water for Reina. Hope (yellow) in the earth for Galuf. Quest (white) in the air for Bartz. After this, King Tycoon appears (notice Faris' reaction), telling you of your mission to defend the Crystals at any cost, and then disappears. You then collect what reamins of the Wind Crystal: the shards. Each shard contains the powers of warriors from the past.
You've also just received your first set of jobs! (*Insert fanfare here*). Boko will take a time out to go over the job system and ablities. This is the same tutorial as in the House of Learning so skip this if you want to. To exit the Wind Shrine step on the teleporter at the back of the room.
Wind Crystal Jobs: Knight, Monk, Thief, White Mage, Black Mage, Blue Mage
Now things start to get interesting. You can configure your party in any fashion that suits your personal style. Know this about your new jobs, oh training warrior:
 Knights are very strong party members, they can equip the strongest weapons and armor and will defend other critical party members, but they lack in the areas of speed and magic.
 Monks attack with bare fists for massive damage and they will counterattack, but they can't equip heavy armor (despite a high Stamina, this leaves them vulnerable) and they are tied for the worst magic rating.
 Thieves excel at one thing in particular: speed. This, accompanied by their default ability to steal, makes them a worthy party member. They can also dash four times as fast as a normal character. This is only an asset when you really know where you are going. They are, however, pretty weak overall.
 White Mages are an essential! Despite terrible scores in the areas of defense and strength they more than make up for it with their healing White Magic. Besides, they won't usually be attacking in critical battles.
 Black Mages have the privilege of being the weakest party member that there is. Still, they are the only characters that can take advantage of the enemies elemental weaknesses via their tremendous Black Magic!
 Blue Mages are average mages, but they are very versatile once they learn all of their magics. Blue Magic, for those of you who are in the dark, is magic acquired through an enemy's attack. It takes a lot of effort to get all of the Blue spells, but among the Blue Magics you will find are some of the most useful and unique spells that the game has to offer.
It's good to start the game off balanced (a party configuration that should be present almost all the time so you can adapt to surprises). This consists of a Knight, a Monk, a White Mage, and Black Mage.