FFV - Walkthrough - Oceanbound
Head back to Karnak to look for the flustered Mid. Go to the second floor of the pub to find Cid still looking dreary. The group tries to rally Cid's support on their new idea of "fixing" the Fire Ship, but to no avail -- that is, until young Mid shows up. Mid proceeds to do some sort of wild dance in front of Cid and tells Cid not to be afraid of failure. Cid overcomes his fear (and his hangover) rather rapidly and realises that the next step is to find and protect the Earth Crystal. The group, having already covered this ground, tells him that they need the Fire Ship for that. Then, Mid shows off the book he found in the library. Cid becomes very excited by it, and leaves with Mid to go to the Fire Ship. It might be a good idea to follow them.
Once you get back aboard the Fire Ship, you'll meet Mid who is busy-busy with the modifications being done on the ship. Cid advises the group to go down below deck to rest while the work is being done. Here Galuf becomes upset and complains of pains in his head. Here we get a flashback of the recent scene between Cid and Mid where Mid does his dance in front of his grandfather. Galuf's abused mind correlates this incident with one of his own foggy memories. A memory where he is on some unfamiliar castle when a blonde haired girl comes out and does that same dance in front of him. Galuf manages to remember the girl's name: Krile. It turns out that she is his granddaughter. Then, Galuf turns to his new friends and divulges the astonishing news that he is not from this world. He came by meteorite to this world to stop an evil spirit "they" had sealed here 30 years ago from reviving itself. The name of this villanous spirit is X-Death.
Next we get another scene (which apparently is another memory of Galuf's) where Galuf and three other characters are sealing up X-Death. Notice that one of them looks quite a bit like the late Wolf. They mention that the power of the Crystals is gathered at this place and would be ideal for their purposes. The camara rises up so that you can see the area in which they were standing - it should look familiar (the passage between the Walz and Karnak Meteors). Galuf still can't remember everything, but he knows for certain that they cannot allow this X-Death to free himself of the yoke he and his friends laid on him 30 years ago.
 When you head up to the deck you'll find Cid and Mid sleeping on the job! After waking them up, they head off to the Library of Ancients to look for more answers, thus leaving the task of actually finding the Earth Crystal in your capable hands.
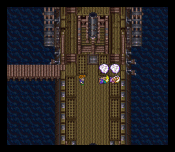
The Fire Ship, once dormant after the Fire Crystal's demise, is now fully operational and ready to sail. You now have a myriad of locations that you can now visit, among them are: the famous Jachol Village and its mysterious cave, the Easterly Village, and the Town of Crescent with its Chocobo Forest. You can also go to visit any of the other towns and dungeons that you have visited previously. To get the plot moving along, however, will have to eventually visit the Town of Crescent. Still, Jachol Village is on the way, so you might want to go there first.
Jachol Village
| Enemies | Treasure | Blue Magic |
| (Water) Thunderpit, Fins (B); (Land) BioSoldier, Bomb, Doublizard (I) | Piano #4 |
To actually get to Jachol Village, you'll have to go all the way to the southern tip of the western continent in your new ship. The monsters you find in the ocean aren't that tough to beat, and they even aid you in their destruction at times: the Thunderpits will almost always drop a ThunderSkill for your Ninja to throw at the Fins that show up. Once you get to land you have to head to the west, through a canyon of sorts. Ignore the cave for now, we'll come back to it later on. Continue around the bend and head south - you can't miss the village! One thing to be careful of out here is the BioSoldier: when you leave just one of them on the sceen they will most likely cast a powerful Bio spell at you which can really hurt a team at around level 15 or so. Take the precaution to always eliminte both soldiers together, for they almost always appear in pairs (or alongside some other critter), so that you don't leave one standing by itself.
| Jachol Village | |
| Weapon Shop | Cleaver (3200), Coral Sword (2800), Mage Slasher (900), Trident (2700), Katana (5800), Silver Bow (1500) |
| Armor Shop | Green Beret (2500), Ninja Suit (3000), Poet Robe (1000) |
| Magic Shop | Cure2 (620), Raise (700), Muddle (650), Mute (280), Protes (280), Cure (180), Scan (80), Antdot (90) |
| Item Shop | Tonic (40), Antidote (30), Eye Drop (20), Maiden's Kiss (60), Cornucopia (50), Soft (150), Phoenix Down (1000), Tent (250) |
The village itself isn't very interesting. You can pick up some nice weapons, but you can steal or find most of these later on, so buy them only if you can afford it. Make sure to find the piano to play what seems to be the same thirds progression as before, but then, it doubles the tempo and plays some stange five note scalar progression that ranges an octave. Well, at least Bartz didn't sound like a four year old this time - still a long way to go though!
The one thing this village does offer in abundance is information. You can ferret out the following: This village is the home of the descendants of the Ronka people (an ancient civilization that was vibrant 500 years ago and has since disappeared.); The cave to the north is the source of the weapons and items sold here, and in order to outwit the traps there you need to "wait patiently on the road with the skulls," "check the open chests," and "climb the farthest wall;" the Crescent Island to the far east issues strange sounds that come from underground, apparently, some believe that something sleeps in the earth under the island; and one person suggests that we check out the Easterly Falls to see how huge they are.
Time to take a look at that cave everyone talks about.
Jachol Cave
| Enemies | Treasure | Blue Magic |
| Nut Eater, Skull Eater | Shuriken, Tent, Shock Whip (maybe....) |
This is a really tiny cave, so it isn't really a problem to navigate. Most of the monsters you run into here a really weak Nut Eaters, but every once in a while you find a nasty Skull Eater. These critters are sort of like the Metal Slimes in the first Dragon Warrior in that they are very hard to hit, they run away a lot, and they only have 1 HP. The Ninja's scrolls take care of them quite nicely though (you should have a bunch of these from the Thunderpit fights). The only point for coming in here right now is to get the treasure.
Enter the cave and go down to the switch on the wall at the bottom. This will open up a path for you but close the main door (don't worry, you can open it up again easily enough). Head down and walk past all of the switches that are lined up there. Recall what the guy told you about waiting for the truth to be revealed and walk about two thirds of the way past all of the switches. Wait until they all disappear except for one, and then press the one that is left over. This will open up another path for you to follow. Go back to the left and up. Head right past the open chest, and then up, past the door, to the other chest. Inspect this chest and the door will open for you.
This new room is big, but easy to navigate and is home to the three treasures. Follow the path up and then head left when you can to pick up the two treasures at the ends of the two branched paths there. Go back to the first intersection, and go up. Head down at the next intersection to get the Shock Whip (a super weapon at this point in the game for a trainer), or a note from Lone Wolf. This depends on if you released him back in Walz Castle. If kept him imprisoned, then you will get the nice whip; if not, then you'll just get his business card. Regardless of the whip issue, that's all there is in this cave, so leave!
You can head up from where you are to go outside by climbing the rock wall, but it doesn't lead to anything (yet). To get out, just follow the path back to the first room and press the switch on the left wall, then the switch near the door - you can figure it out easily enough.