FFV - Walkthrough - Gatecrashing The Party At Galuf's
| Enemies | Treasure | Blue Magic |
| Pao |
After stocking up at Rikks Village and making sure that your party is hovering right around level 20, head for the point at which the energy of the four meteors intersect. Check the map if you're lost. Land the airship and approach the blue area. This will lead the team to a large hole in the ground. Inside the hole is some sort of energy vortex, or whirlpool. Bartz, Reina, and Faris all say goodbye to their world in their own way. Then, realising that they may never see home again, they jump in. Just as before with Krile and Galuf, the team is hurtled skyward - up, up into oblivion.
The trip is a rather short one for the next thing you see is the earth, or rather some other planet, rushing up at you! Miraculously, the team is not damaged from the tremendous re-entry temperatures or the terminal velocity impact with the ground, but we'll let them off. Bartz wakes the two ladies up, and you are in control once again.
There isn't much to explore as you landed on a tiny and remote island. The only enemy you encounter is a measly Pao. You can wander around for a while collecting Tents from the Pao's (they almost always drop one). Reina will keep pestering you to use a tent, so do as the lady says and use one.
The scene will shift to a gathering around a small fire. The sisters decide to take advantage of the situation to have a good chin-wag. Faris wants to know why Reina risked her life for the Tycoon Dragon way back on North Mountain. Reina tells of how the dragon reminds her of their mother - teenagers eh? The group settles back for a nice, cozy snooze when the fire goes out and this blue freak runs up and snatches Reina and Faris. He steals them?! The blue freak returns to nab Bartz as well, but Bartz decides to put up a solo fight.
| BOSS 21: Abductor | Level | 21-22 |
| This boss is pretty easy if you know what to expect. The first thing it'll do will be to reduce your HP to single digits with its Hurricane attack, and then it'll try to finish you off physically. So all you have to worry about is being quick enough to replenish your life with a timely Potion. Use a quick Job like Ninja or Hunter or Thief and simply pummel the creature into submission. It has around 1500 HP. You can also steal an Earth Robe from it if you feel up to the challenge. An Ether is your prize for victory. | ||
Regardless of whether or not you vanquish the Abductor, the same fate will befall you. If you lose you will be abducted, and if you win you're left with a chest with sleeping gas inside and you will still be abducted! Ahh!
X-Death's Castle
| Enemies | Treasure | Blue Magic |
| Shell Bear, Tarantula, (imprisoned onlookers) | Crystal Shards |
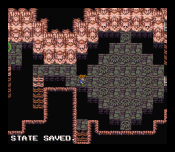
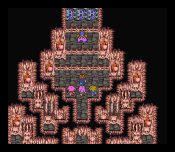
You wake up in a jail cell. It doesn't seem likely that Cid will blast through the wall this time, since he's on some other planet. The chilling music precedes the entry of public enemy #1: X-Death! The wicked sorcerer gloats over your capture, and seems about to perform some ghastly deed when he is interrupted by one of his evil henchmen. The hench-thing informs X-Death that Galuf & Crew are approaching the Big Bridge (whatever that is...). X-Death tells the hench-guy to prepare the Giant Mirror! With the magical mirror in place, X-Death broadcasts the team's image up into the skies above the castle.
Krile, down on the bridge, points the reflections out to everyone. In the image, X-Death somehow communicates that he will kill Bartz & Company if any attempt is made to lay siege to the castle. Galuf has no choice but to call a reluctant retreat. At the same time, inside the castle, X-Death commands his right-hand man, Gilgamesh, to guard the prisoners. Bartz, frustrated beyond belief, mouths off at X-Death, and leaves himself open to a brutal magical attack from the dark wizard. All seems lost!
Such isn't the case though - Galuf commands that his dragon be released, and he rides it all the way across the bridge and up on top of the castle. After sending the dragon back to Krile, Galuf enters the castle and immediately finds the Crystal Shards. You are now in control. And you are all by yourself! Don't worry too much though as the enemies aren't that difficult and there's a save point up ahead.
1st Floor
From the chest, head to the left and go into the upper door in the centre of the room for that save point. If you continue up you'll come to some refreshing springs that'll rejuvenate you. Once you've finished washing in the spring, head down, past the save point, and into the main room. Head to the left to find some stairs. If you run into a Shell Bear through here, then you can steal a Spear from them. This weapon is better than the Mythril Pike you bought way back in Karnak, but if you managed to get a Javelin from those pesky Sand Bears, then don't bother; that is, unless you're weird like me and must get all of the items.
B.1 Floor
Just head right, past the imprisoned onlookers...
B.2 Floor
Head to the NW corner to find the next set of stairs.
B.3 Floor
When you get here make sure that Galuf has a good offensive Job equipped (Knight, Monk, Ninja, etc.), and use a couple of tonics to max out his HP. When you round the corner, you come face to face with...
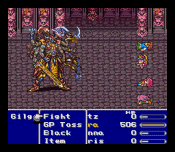
| BOSS 21: Gilgamesh | Level | 21-22 |
| Don't worry about stealing here - Gilgamesh doesn't have any of his fabled items yet. In fact, he doesn't have anything to steal at all. How boring! Just use strong physical attacks for an easy victory. After causing about 1500 points of damage, G. will flee the scene, saying that he let you off easy. (He wasn't kidding!) | ||
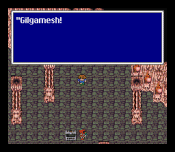
Galuf opens the cell door and the team is reunited! Now you have to get out. Just follow Galuf's footsteps back past the imprisoned onlookers and up to the 1st Floor. The exit is in the middle of the room, on the south wall. Notice that the door above the exit is locked.
Once you get outside, take a moment to enjoy the nice, new overworld music. The enemies here will take advantage of your isolated position, so don't play around with them too much. The WaterBus enemy does have the PepUp Blue Magic if you need to get a quick boost on your HP (You'll need to !Cntrl them to do it though). Eventually, you'll need to head west to reach your goal:
Big Bridge
| Enemies | Treasure | Blue Magic |
| LilChariot, Wingkiller, Fishite, Neo Garula |
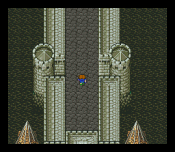 When you arrive here you’ll notice some REALLY nice music playing. I call it "Battle with Gilgamesh," but that's probably not the official title. There's not much to this 'dungeon.' I mean, it is a bridge after all; you can't get lost. All you have to do is head up to reach the other side. Sounds easy right? Well, if you've been playing the game up to this point, then you know as well as I do that there is never an easy out.
You will be hit by a constant stream of pretty strong enemies with a boss fight in the middle of it all. The random enemies consist of LilChariots (they use a powerful attack, the Mustard Bomb (not a 'Blue Magic' - that's IX) to inflict about 250 points of damage and then it will continue to drain the target's HP - kill them before they get a chance to use it), Wingkillers and Fishites (they have strong physical attacks, but are relatively weak - easy to dispatch), and the Neo Garula (this is a reincarnation of the Garula you faced in Walz Tower, and, like before, magic is useless against it).
When you get to the midway point on the bridge, Gilgamesh will attack again!
| BOSS 22: Gilgamesh (part 2) | Level | 21-22 |
|
Don't think that Gilgamesh is going to be as easy as last time. First of all, he has a Hero Drink to steal, so make sure you get it. Now, for the first part of the battle G. will keep hitting you with his sword doing about 100-125 points of damage depending on your armor. Just hit him with strong attacks, but don't waste any of your big guns yet (like Shurikens, MP for Summons, etc.).
When you've inflicted enough damage to G. (about 1500HP), then he'll get really annoyed and cast Armor, Shell, and Haste on himself and start jumping on you repeatedly! Those jumps hurt too - if he lands on a mage of some kind, then they'll take about 400-450 points of damage. Pray that he will decide to beat up on your well-armored Knight or Sorcerer. To try to avoid this cast Mute on G. to prevent him from casting his beneficial spells (or use the Sorcerer's Mute Sword attack). Unfortunately, the length of magic effects is hard to tally in FFV, so don't rely on this tactic too heavily. Instead, counter his jumps with Cure2 (don't be afraid to use a Potion, or even an Elixir - that's what they're there for!), and nail him with Shurikens and Titan summons. He should go down shortly. |
||
After the fight, wipe the sweat from your brow and continue to head up. You might encounter another fight or three before you reach the end so be prepared for them. When you finally do reach the end of the bridge, Krile is there to meet you. But, before the team can even say hello to her, X-Death decides to engage his Barrier! The force of the blast sends the team soaring through the air, leaving Krile all by herself.
The team is, again, miraculously unharmed by the gigantic explosion (they must have inertial dampers), and have come to land on some large rock. Galuf announces that they have landed in Guroceana: the wilderness of wildernesses. Bartz tries navigate past Galuf's strange remark by apologising for their appearance. If they hadn't have shown up when they did maybe Galuf and his troops could've beaten X-Death before he engaged his shield. Now we'll never know. Galuf accepts Bartz's apology, but he's glad to see his friends once again.