FFV - Walkthrough - Save The Dragon - The Sequel!
| Enemies | Treasure | Blue Magic |
| DrgnZombie (F), Skelesaur (F), PoisnEagle, Drippy (P), Grimalkin (F), Golem | 12000G, Cottage, Bonemail, Coronet, Wind Sword, Phoenix Down, Dragon Grass |
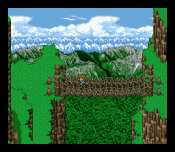
The enemies out here are the same as before, so continue northward with confidence. Keep heading up/north until you see a lone mountain surrounded by grasslands. Head between two of the largest arms of the mountain to reach ...
Valley of the Dragons
The first thing you should do when you arrive at the valley is to make one of your characters into a Bard, that is unless you’ve already mastered the !Sing ability. That is because some of the tougher enemies in here, the DrgnZombie and the Skelesaur, are undead. They’ll fall quickly to a couple of mournful chords off of the Bard’s harpstrings. Also of note is that you can steal some Dark Matter from the DrgnZombies around here (get as much as you can - the Dark Matter is extremely useful when you’ve mastered the Chemist’s !Mix ability). The DrgnZombies also drop a Dragon Fang every once in a while.
Watch out for the Skelesaur; its Bone attack will take you down to single digits, and the PoisnEagle will poison you if you let it. You can steal a Mythril Hammer from the Drippy creature, and you can also !Cntrl it for the MagHammr Blue Magic if you haven’t already got it by now. So strap on those hiking boots - it’s time for another adventure among the clouds!
If you run into a creature called Golem, and it is by itself, then DO NOT attack it! If you attack it, then it’ll run away, and you’ll never be able to get the Golem Summon. It will just run away if you leave it alone after a turn or so.
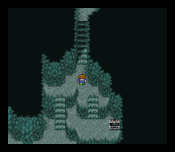
First thing to do is to head up to the first cave that you see. Inside will be a nice chunk of change - 5000 Gil to be exact. Exit there, and head up to the next cave. Follow the simple path to the outside. Loop around to the right out here and go into the next cave. Head down, and grab the Cottage there, then continue to the left and head back outside. Cross the rope bridge, and then head into the next cave. Then, simply follow the path to the next exit.
You should see some bones lying about out here. You can find the Bonemail if you inspect the 'rib bones' to the south of the second 'skull.' The Bonemail has a super Defense stat (30), and it is light, but it will make the wearer react to spells as if they were undead. My advice: just leave it in your inventory. You should also run into the Golem creature again (or for the first time) around here, only this time he is fighting a DrgnZombie and a Skelesaur. Your job is to save the poor Golem. The easiest way would be to use Requiem, which will do heavy damage on both monsters, but will miss Golem all together. The battle is pretty easy, just be sure you don’t have a Berserker in your party, or he’ll just keep on attacking like the moron that he is, and you’ll lose the chance to acquire Mr. Golem. Also be sure not to just hold the ‘ok’ button down to quick attack, or else you might trigger an attack after you’ve already beaten the DrgnZombie and the Skelesaur. After the battle, make sure to use the item Golem in your inventory, or you won’t be able to summon him in battle.
With Golem in tow, continue onward into the next cave. Here you will find a seemingly impassible door. Walk to the right of the door and down one step to find a hidden hole! Dust yourself off, grab the cashola (7000G) here, and then head into the grey door. Hit the switch in here, and then head back out and around to come out of the impassible door. Head back outside, and go into the new cave entrance.
Inside, use !Secret and head left first to get the two nice treasures: a Coronet and a Wind Sword. The Coronet is a must have item for your Trainer - it will make controlling enemies a LOT easier from now on. The Wind Sword is a nice upgrade from your Katana, if your using the Samurai job class. Loop back around and follow the path down the steps to a nice, cozy Save Point. Head to the left and then outside (don’t forget to pick up the Phoenix Down). Follow the path until you come across the Dragon Grass. Reina and Faris go to pick the grass, but it erupts in a tangled nightmare of thorns and vines. Bartz and Galuf come to the rescue! After quickly surmising that the grass must be possessed, and is the cause for the extinction of the dragons, you attack it.
| BOSS 24: Drgn Grass, Drgn Bulbs | Level | 31-32 |
|
This boss is a piece of cake if your at the suggested levels. First of all, cast Golem if you want to, but it isn’t really necessary. Then keep casting Titan over and over, while healing occasionally and hitting the main Drgn Grass with strong physical attacks. The grass will whither in a few rounds like that.
If your levels are a little below the standard here, then you might need a little more strategy. First thing to be careful of is that Drgn Grass likes to poison you, so equip accordingly (i.e. White Mage, or !White4 and up for Esna). As for the Drgn Bulbs, each one is unique. Some are resistant to physical attacks, while some are resistant to magicks of certain elemental types. As far as I could tell, the attributes for each one were randomly chosen. The only things that are sure bets against all of the bulbs are strong, non-elemental attacks: $toss, some !Mixed potions, and !Earth magicks are good. However, since all of those options are either limited, or unreliable, then use Titan. Another useful weapon in your arsenal here should be your !Time magic. Use Slow2 and Haste liberally, use Return if things turn ugly, and Comet will put the hurt on Drgn Grass big time. So, a good group would be a Knight with !Earth, a White Mage with !Mix, a Summoner with !Time, and a Ninja with !Sshot. Good Luck! |
||
Once you’ve trimmed the hedges properly, you should get an Elixir. Then, the Dragon Grass shrinks down and Reina grabs it. (Super Fanfare!) Use this opportunity to cast the Telepo spell for the first time, unless you want to head all the way back down collecting more Dark Matters and Dragon Fangs from the DrgnZombies; probably the best monster in the game for those two items!
Head ALL the way back to Val Castle with the Dragon Grass in hand. Galuf will then demand that he, the King of the Castle, the Lord of the Manor, be let in. The guards won’t do it, for they think that Galuf is really some vile enemy impersonating Galuf. Galuf has no choice but to use his “Secret Weapon!” Whereupon, he proceeds to jump into the moat! (Bartz needs a little encouragement here because of his phobia.)
Head to the upper left side of the castle’s moat and press the switch somewhere around there. The tube brings the group into the courtyard. Go yell at the guards if you want, but then head up to Krile’s room. She seems to be ill , saying that "Gill is calling...".
Gill turns out to be a 700 year old mage who prophesied that Bartz's, Reina's and Faris' planet's crystals would break. Krile encourages the group to go see this Gill, for he must have some useful information for the entourage. After everyone agrees to the mission, Galuf tells you where this Gill is located: on an island north-east of the Valley of the Dragons. Nods are passed around.
Head up to the Dragon’s balcony. Reina will try to feed the Dragon the grass, but he won’t eat it (he must still think it possessed). Reina eats some to show that it is ok even though she knows that it is poisonous to humans. The Dragon nibbles some of the grass, and then stretches in newfound vigor! Then Reina collapses. Krile comes to the rescue and gives Reina (the idiot of the week) some Elixir. Reina regains herself, but then Krile collapses (sigh). Bartz comments that everybody goes a little overboard around here. Galuf encourages Krile to continue resting, and then everyone hops aboard Dragon Airlines.
Krile sees you off, and you finally get the Dragon to control! The dragon is now yours and can be used to visit many places all over the world map. But at first you will need to leave the continent Val is on. Fly through the opening east of the dragon's valley. Once you left the continent, head north to Gill's Island. As soon as you want to enter, the island sinks down into the ocean. Visit Kelga now and he will tell you to go to Zeza's castle, Surgate.