FFV - Walkthrough - Wilderness Of Wildernesses! 2
Moogle Forest
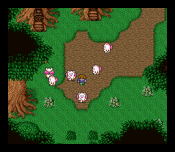
 When you are super pumped up from your victories over countless ShieldDrgns, then continue to the south/south-east. Follow the narrow strip of land until it turns to the north. Here you’ll spot a lone thatch of forest surrounded by mountains to the immediate east of your position. That is Moogle Forest. Enter and take a few moments to dance around like an idiot to the classic tune.
The only thing to do here is to talk to the solitary moogle nearby. It’ll run off like a madman and then fall into some sort of hole with an exclamatory "Kupo!". Galuf takes a moment to explain that moogles are shy little creatures that live in the woods around here - they are very timid. Reina’s soft heartedness comes into play yet again as she encourages the group to help out the solitary fluff ball. Fall into the hole after the moogle (I’ll just call him Mog).
Underground River
| Enemies | Treasure | Blue Magic |
| Mog Eater (B), BloodSlime (F), Acrophis (B), Freeziabat | 4400gp, Phoenix Down |
It's a good idea to bring along a few mages in this small watery cave. All of the monsters here have really high defenses, and the BloodSlime is completely impervious to physical attacks. They are, however, easily dispatched by the correct elemental spell. Use a Fire2 spell on the BloodSlimes, and Bolt2 on solitary MogEaters and Acrophi. For groups of Acrophi, summon Ramuh to make roasted crab out of them, and the Freeziabat will fall quickly to a Comet spell. You can’t really steal or learn anything important from these guys, so don’t sweat out that aspect of the game play.
River Level
Treasure: 4400gp
The dungeon itself is fairly easy to navigate. All you have to do is walk into the water, and it will carry you to the next locale. Do be aware that the enemies will attack while the water is carrying you around, just like the Sand Tides way back on world one. So, just be sure to use the dry spots as little rest zones if you need that sort of thing.
If you leveled up to level 30, then this dungeon is a piece of cake. So, walk into the water ahead of you. You will be carried to a spit of land. Walk into the water again and you’ll be carried to another spit. (For those of you who aren’t Fishermen, then a spit is a deposit of silt left by the meandering of a river; the silt builds up eventually to form either islands or small jutting peninsulas.) The second spit has a treasure on it. Grab it for some fast cash, then head down. It doesn’t really matter which side you take, as they both lead to the same place. I usually take the left stairs. You might have to navigate another small room depending on which side you take, but you won’t miss anything either way you go.
Cavern
Treasure: Phoenix Down (or, Potion of Certain Doom, depending on who you give it to)
In this vast new room, grab the Phoenix Down sitting there in front of you, and head to the right. You’ll eventually come face to face with Mog and some strange skeleton/creature. They seem to be chewing the fat. When you try to interrupt their discussion, the Skeleton/Freak will announce that three is a crowd and then attack you!
| BOSS 23: Tyrasaurus | Level | 30-31 |
|
This Boss has only two types of attacks. One is a physical attack and the other is the ???? Blue Magic. While the regular attack should pose no threat to you, the ???? attack just keeps getting stronger and stronger. Because the Boss has 5000hp it is safe to say that the ???? attack will kill you outright if it hits after you’ve caused about 1000 points of damage to the creature.
This boss, being an undead, has a weakness against fire. So make a party of three summoners and a healer, and pummel the walking science exhibit with Infrit’s Hell Fire attack. It’ll be over really fast that way. If you want to cheat, then you can use that Phoenix Down that you found and kill the freak right away, but we at FF:WA demand honorable battles to be waged at all times. Well, do whatever you want. Also, you can steal a Gold Shield from the thing, but you should already have one anyway. |
||
Enemies: Cactus (Wa), Sandcrawlr
After the battle, Reina tries to approach Mog to gain his/her trust (IX screwed up my whole gender notion of Mog ). Slowly, the moogle realizes that the group means no harm, and shows the way forward. Pay attention here folks!
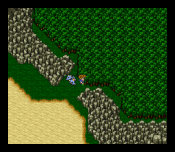
Mog goes on a wild fit of running, and eventually winds up in a forest far to the north-east. Notice how he avoided the desert? You should follow Mog’s example and follow his footsteps to reach the area where he/she disappeared. Mog avoided the desert for a reason, and if you are bold enough you can find out for yourself - just be sure to save before you do.
The Cactus enemies are tough because they use the Blow Fish Blue Magic (remember, it will cause 1000 points of damage all the time), but they are easily dispatched with a quick AquaRake. The real menace here is the Sandcrawlr. This thing is just plain annoying! It has no weaknesses, 15000HP, and you can't run from it at all! What’s more, you don’t even get all that much exp/gp/abp for beating the thing, and you can’t steal anything useful. It has a Maelstrom attack that will put the hurt on you , but when you control the thing....none of its attacks are really that helpful. The best thing you can do is avoid the desert at all costs.
So, follow the swath of forest through the deserts. (Don’t worry, there aren’t any monsters out here other than in the desert.), and try to find the exact location that Mog disappeared. When you step on the right spot, then you enter...
Moogle Village
| Enemies | Treasure | Blue Magic |
| Ether, Phoenix Down, 10001gp, Dancing Dirk, Cottage, Elf’s Cloak |
When you enter the cosy forest sanctuary of the Moogles they will all run away! Remember what Galuf said about them being timid. The only thing you can do now is to head to the far upper right corner of the village to find your good mate Mog. Mog will seem to run at first, but then he/she recognizes you and opens the door to his/her hut. You will follow Mog inside. Before you divulge the chests of their contents however, you should immediately exit Mog’s hut and head on over to the hut in the centre of the village. (All the wandering moogles will say is ‘kupo‘ none of them run a shop.)


Inside the centre hut you will find a lone moogle. Talk to it to discover that it isn't really a moogle at all, but a Moogle Costume! Put it on and strut your stuff around the village. After some serious strutting, then head on over to the hut on the far left side of the mini-town. The Moogle inside will confess its love for you (?!) and unlock the treasure chest there. Inspect it to find another handy Elf Cloak (equip it right away!). Next, head back to Mog’s hut and grab all of the bounty. Of special note here is the Dancing Dirk. This powerful dagger enables the wielder to cast random dances while inflicting above average physical damage the rest of the time. An excellent upgrade from your HalcyonBlade.
Once you’ve grabbed all the treasure, head outside. Then, try to re-enter Mog's hut. The fuzz ball will start to climb its tree house. The scene shifts to Krile and her moogle, Bob. Since all moogles are telepathic, then Bob is aware of where the fantastic four are because of some sort of communication from Mog. Krile, oh so conveniently, can communicate quite easily with the moogles. Krile wants to go ahead and rescue them, but Galuf’s dragon seems to be out of commission. It must’ve gotten hurt when the Barrier was raised. Still, even though the dragon is obviously in pain, it rears its head, trumpets its call, and volunteers for the mission.
Back in the tiny village, all of the moogles are doing some sort of dance. The lead one points to its pink nose, and the entire forest changes into a gigantic moogle face to show Krile where to land. After a brief reunion, everyone piles onto the poor dragon’s back and heads back to Galuf’s and Krile’s home: Val Castle.