FFV - Walkthrough - Wilderness Of Wildernesses! 3
Val Castle
| Enemies | Treasure | Blue Magic |
| RockStatue (B) | Hero Drink, Telepo Spell, Angel Robe, Lamia’s Harp, Great Sword (aka. Regal Cutlass) |
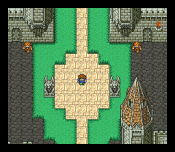
Please wait until Dragon Airlines has come to a complete stop before letting loose the panic grip you have on its scaly hide. Thank You. We are now arriving at the cozy Val Castle. It is a temperate 73° outside. Please choose Dragon Airlines for all of your future travel needs!
| Val Castle | |
| Weapon Shop | HalcyonBlade (3400), War Hammer (6400), Katana (5800), Half Moon (5600), Wind Lance (5400), Dark Bow (3800), Dream Harp (1600), Chain Whip (3300) |
| Armor Shop | Gold Shield (3000), Gold Helmet (3500), Green Beret (2500), Wizard Hat (1500), Gold Armor (4000), Ninja Suit (3000), Earth Robe (2000), Gauntlet (3000) |
| Magic Shop | (White): Blink (3000), Shell (3000), Esna (3000) (Black): Drain (3000), Break (3000), Bio (3000) (Time): Comet (3000), Slow2 (3000), Return (3000) |
| Item Shop | Potion (360), Tonic (40), Phoenix Down (1000), Soft (150), Maiden’s Kiss (60), Cornucopia (50), Eye Drops (20), Antidote (30) |
 When you land, Krile will take the dragon away for a much needed rest. (Where’s Bob the Moogle?! I thought he went with Krile?). Just then a troupe of soldierly looking men rushes up to the group and calls to Galuf. Galuf listens and tries to organise the situation: it appears that X-Death has been hibernating in his shell ever since it was erected, but Galuf's troops are being torn apart by X-Death’s monsters! Oh, cruel fate! (Wait a minute - 'Galuf's troops?' How did gramps get to have troops? Why, he’s a king!). Bartz is taken aback to discover that Galuf, his chum, has royal blood. Galuf reassures the group that he hasn’t changed - he’s still the same old Galuf, and after all of the appropriate Final Fantasy nods and bows you finally have control.
Get those gums flappin’ to discover all kinds of juicy tidbits, like the following: X-Death weighs heavy on the minds of the loyal soldiers. They say that the Big Bridge is being protected by X-Death’s Barrier - the only way to get to the castle now would be to use a dragon (hint, hint). Still, the soldiers have no way of getting outside because of the monsters waiting to ambush them if they open the castle gates.
However, most of the info is random -- Gilgamesh, X-Death’s right arm, is general to the armies of evil; The weapons and armor that Galuf took with him in the Meteor must’ve been broken (drat); One soldier points out the locale of a very useful spell: Telepo; Val Castle itself is very old - most of its secrets still remain uncovered; There’s a bit about when Krile was young, her parents went to save a dragon in the Guroceana Desert, and were never heard from again. You also learn about Krile’s ability to talk with Moogles, which you already knew, and some stuff about Optimum Equip’s faults. (Got to equip those Elf Cloaks by hand - Galadriel would be upset if you didn’t wear them.)
If you want to you can get a very charming ‘Grrrr’ from the dragon. Looks like he’s still pretty banged up from the Barrier mishap. If you talk to Krile you will find out that the dragon is dying...! Reina (of course) thinks that Dragon Grass might help - just like before, but the only plausible location to find any would be in the Valley of the Dragons. Typically, no one has ever returned alive from there for many years. Bartz encourages the group to go. Thusly encouraged, Galuf points the way to the Valley: to the North, past Kelb Village, where Werewolf wears his wares!
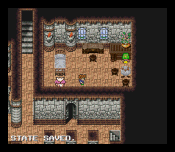 But you can’t leave just yet! You have to get all of the treasure! From your starting point in the King’s Hall, you can nab a Hero Drink in the left-hand corner. Also in the same corner, hidden by a secret passage is the must have item for today, the Telepo spell. Leave the Hall and head straight down through the foyer and into the courtyard. In the middle section / building the Item shops and the Inn reside, but no treasures. Head to the far left of the courtyard and enter the west wing of the castle. Here are the merchants of the castle, but we don’t care about their crappy wares.
Head up to the stairs, and then use the second set of stairs to reach the roof. Once here, head directly to your right to find a hidden set of stairs behind the tower. Follow this passage to a little niche behind the shops. There is a very nice Angel Robe here for you, but wait - that's not all: if you act now you can also receive a fabulous Lamia’s Harp! See the switch on the other side of the wall? Press up against where its mate would be and press X. An archway should appear. Run inside and pester the shop keeps until they give you the harp just to go away.
Lastly, go back outside to the courtyard and head to the patch of water in the lower left hand corner. Wander around in the water until you get sucked through some sort of vacuum tube and are deposited out in the moat (I think the tube is in the lower left hand corner of the water). Anyway, your here in the moat, you might as well look for goodies. Head all the way around the castle and search the ground with X near the dead end. You should find a Great Sword, but when you look for it in the menu it isn’t there! "AH! What vast amount of cheapness is this?," you might be asking yourself. Not to fret. The Great Sword is also called the Regal Cutlass. Why the game designers did that we may never know...
Now, you have a game play decision to make; You can either head north right away, or you can stay at the castle for a while building up Job Classes. How does one build up job classes? Well, there’s a basement in Val that you may, or may not, have found. The stairs that lead there are in the east wing of the castle - pretty hard to miss. There are copious amounts of these enemies called RockStatues here. They pack a whollop because they are intended to scare you away from the basement area for now, which you come back to in World 3 to get a very powerful summon. They appear in groups of either two or five and you get four and eight apb respectively for defeating them! There is a very cheap way to beat them: use a soft on them. It causes them to cast a Doom-like spell called Dark Returns on themselves.
You needn't stay for long - there are better places for ability acquisition down the long and wearisome road that you must tread. Do get a few of the really useful abilities, though. I like to have !Sshot, and 2-Swords at least, but don’t stop there! Level up those mages of yours (if you have any) to masters, and get them working on something new. Remember: variety is the key to success in this game. Still, this is an optional venture. At level 30, the rest of World 2 is cake. Only do this if your a doorknob like me, and must get absolutely everything out of the game.
| Enemies | Treasure | Blue Magic |
| Ridicule (B), Kornago (I), Weresnake (I), Aquazone (B) |
When you are all set for the road, chat with the gate guards, who says that going outside is a one way trip - they won’t be able to open the doors up again for fear of the lurking monsters. What a bunch of wimps! The jaded group merely shrugs at the cowardice displayed before them and steps out the castle gate. It is promptly slammed shut behind them! Wimpy monsters then commence attack! It’s the Abductor from way back at the beginning of this world. Once you quickly and easily dispatch the menace you are finally back on overworld map.
The enemies out here are pretty wimpy, but that’s because you beefed up to level 30 and got !Sshot and 2-Handed. Only the Kornago is of any note, but we’ll come back to that. You can wander around out here for a bit and find a cave to the east, but don’t go in there! The enemies are too strong for you now.
Gilgame’s Cave
| Enemies | Treasure | Blue Magic |
| Groundpede (absorbs E), Gilgame (I) | Loads of Gil |
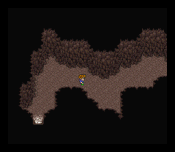 If you want to be an idiot and brave the cavern anyway, it can be accomplished. There are only two enemies in here: the Groundpede and Gilgame (the evil king of all turtles). The Groundpede, in all honesty, isn’t really that hard. Just don’t underestimate him. Gilgame, on the other hand, is a real pain in the you know where! All he does is bum rush (ooh-err) you with brutal physical attacks. You can use Ice magic against him, but that will leave your mages open to killer physical attacks because they don’t have any defense to speak of.
I beat him with two Knights (each with gold equipment and the 2-handed ability), and two Ninjas; one with !Sshot and the other with !Summn. I used potions to heal. He was still hard though. Be careful if you decide to tackle the terrapin. (I wonder if anyone appreciates my obvious efforts toward alliteration? - I do Steve, I do -rob)
Anyway, the whole point of coming into the cave is not just to beat Gilgame, but to reap the vast amounts of gil that can be harvested here. Don’t worry about getting lost because you can’t. Once you get to certain point in the cave then you will start to pick up gil. It doubles for every step, but Gilgame will pounce on you around here. My sound advice is to ignore the temptation for now, and wait until you’re near the end of World 2.